Cisco Meraki
In this section, there exists Cisco Meraki MR18 series configuration sample. It may differ depending on the firmware version. This document was created according to the Cisco Meraki MR18 device.
SSID Setting
If you don't have a SSID, you need to setup one first.
To create a new SSID go to "Wireless > SSIDs", choose an unconfigured SSID, rename (e.g.: "Wirofy") and enable it:
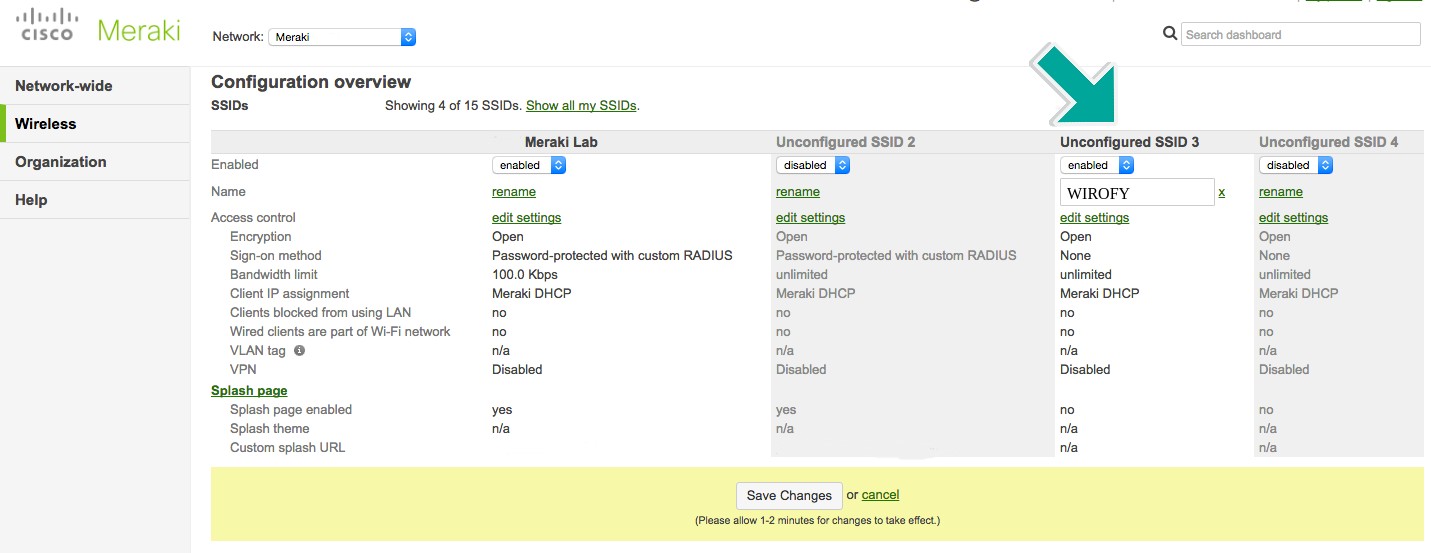
Now you need to setup the SSID Access control and Splash page. The next steps explain each of them.
Configuring the Access Control
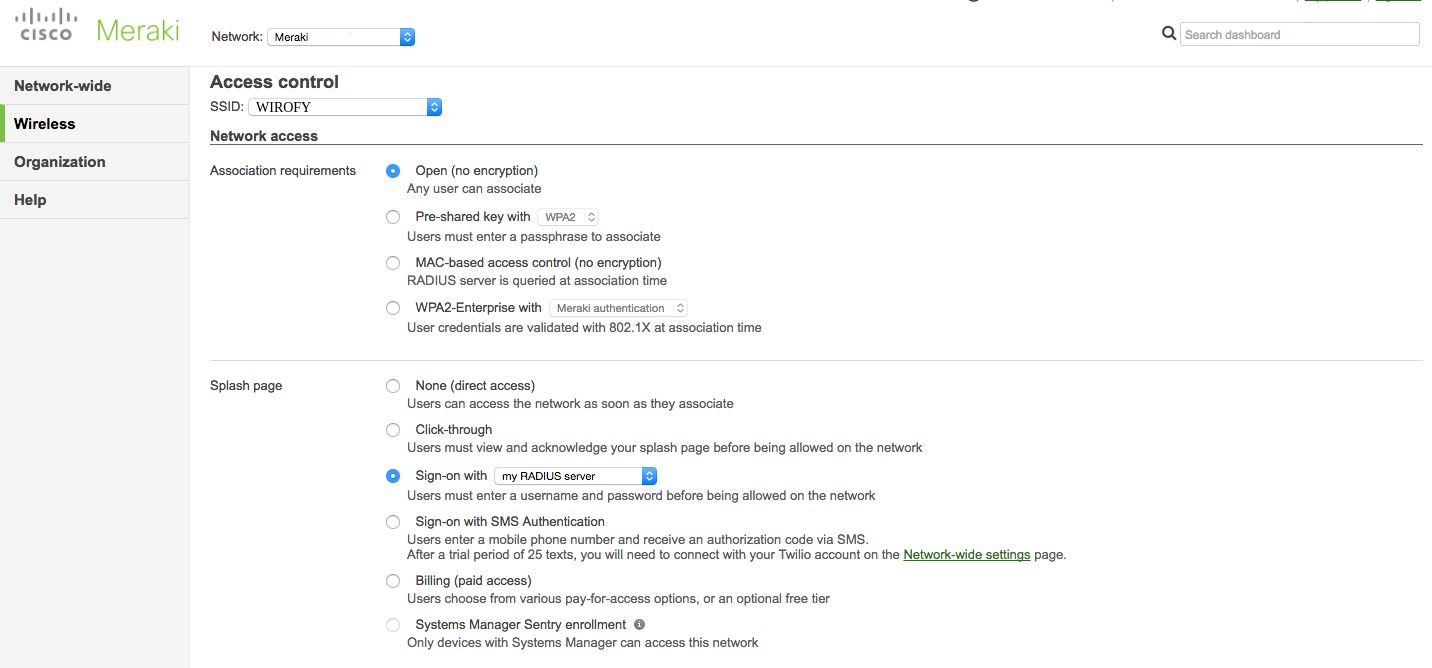
To configure the SSID Access Control, go to "Wireless > Access control", select the SSID previously created or your own SSID and apply the following settings:
Network Access
- Association requirements: Open (no encryption)
- Splash page: Sign-on with my RADIUS server
RADIUS Setting
Before entering the settings here, the information specified for the device should be noted on panel.wirofy.com. Click here to view the document.
RADIUS Authentication On "RADIUS for splash page", click in "Add a Server" and fill with the following info:
- Host: panel.wirofy.com -> RADIUS Authentication IP
- Port: panel.wirofy.com -> RADIUS Authentication Port
- Secret: panel.wirofy.com -> Shared Secret
RADIUS Accounting On "RADIUS accounting", select "RADIUS accounting is enabled". On "RADIUS accounting servers", click in "Add a Server" and fill with the following info:
- Host: panel.wirofy.com -> RADIUS Accounting IP
- Port: panel.wirofy.com -> RADIUS Accounting Port
- Secret: panel.wirofy.com -> Shared Secret
NOTE: by default, the "RADIUS accounting" settings are not available in the Meraki account. You need to open a support case to request Meraki to enable this option. Just go to "Help > Cases", create a new case and usually within a day Meraki enables it. {.is-info}
You can also set "Captive portal strength" to "Block all access until sign-on is complete".
Walled Garden Setting
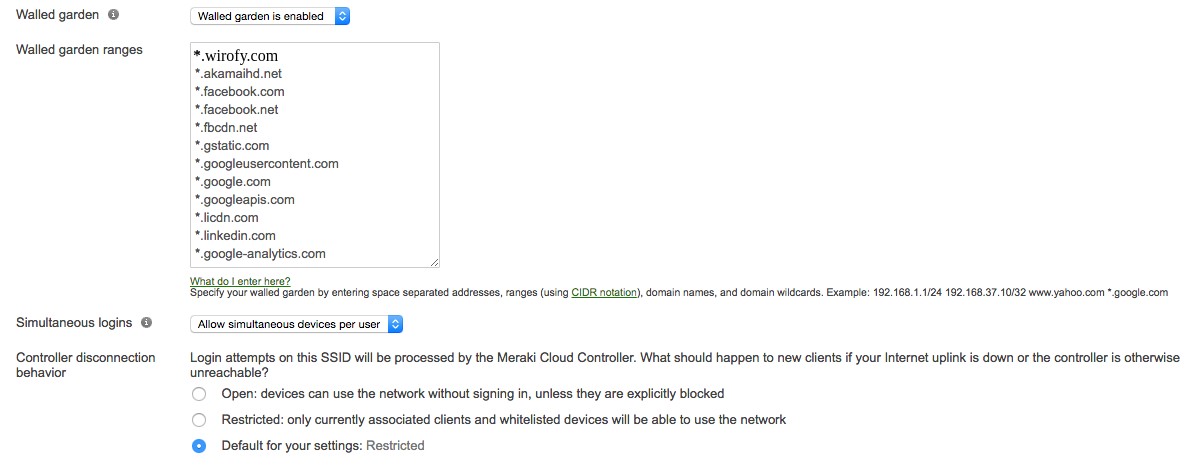
Allow Wirofy Identity and Access Platform URLs and social network URLs by configuring the Walled garden destinations.
- Walled garden: Walled garden is enabled
- Walled garden ranges: Add the entries according to Walled Garden for the Social Login URLs.
*.wirofy.com wirofy.com
NOTE: by default, the "Walled garden ranges" do not accept domain names and wildcards. You need to open a support case to request Meraki to enable this option. Just go to "Help > Cases", create a new case and usually within a day Meraki enables it. {.is-info}
Addressing and traffic
- Client IP assignment: NAT mode: Use Meraki DHCP
- Content filtering: Block adult content

Then save your changes.
Configuring the Splash Page
Before entering the settings here, the information specified for the device should be noted on panel.wirofy.com. Click here to view the document.
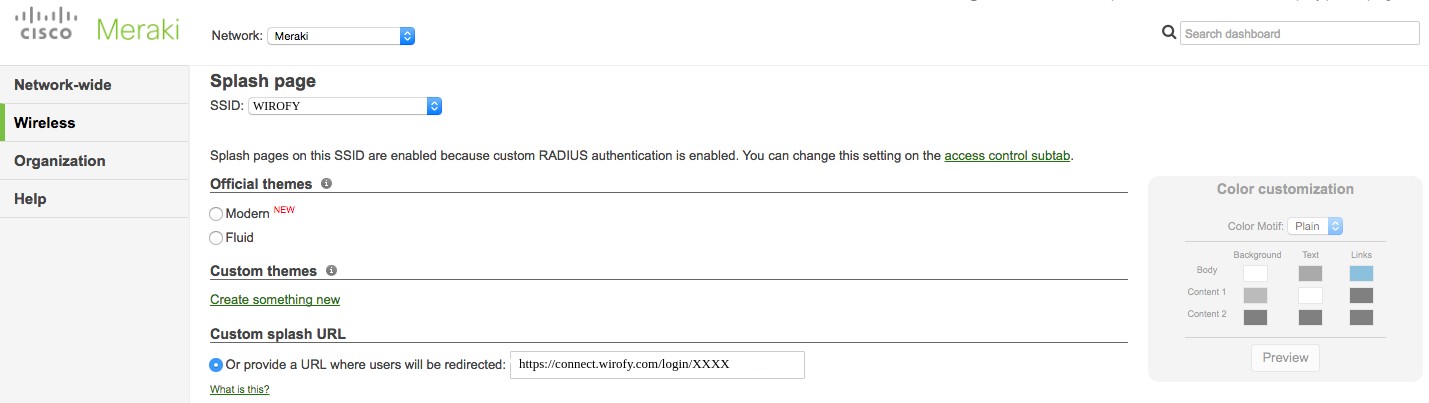
To configure the SSID Splash Page, go to "Wireless > Splash page", select the SSID previously created or your own SSID.
You need to define a "Custom splash URL":
- Or provide a URL where users will be redirected: panel.wirofy.com -> Login URL
On "Splash behavior", you can configure:
- Splash frequency: customize how often your users will see the splash page (e.g: Every hour).
- Where should users go after the splash page?: select "A different URL:" and fill the provided captive portal start URL
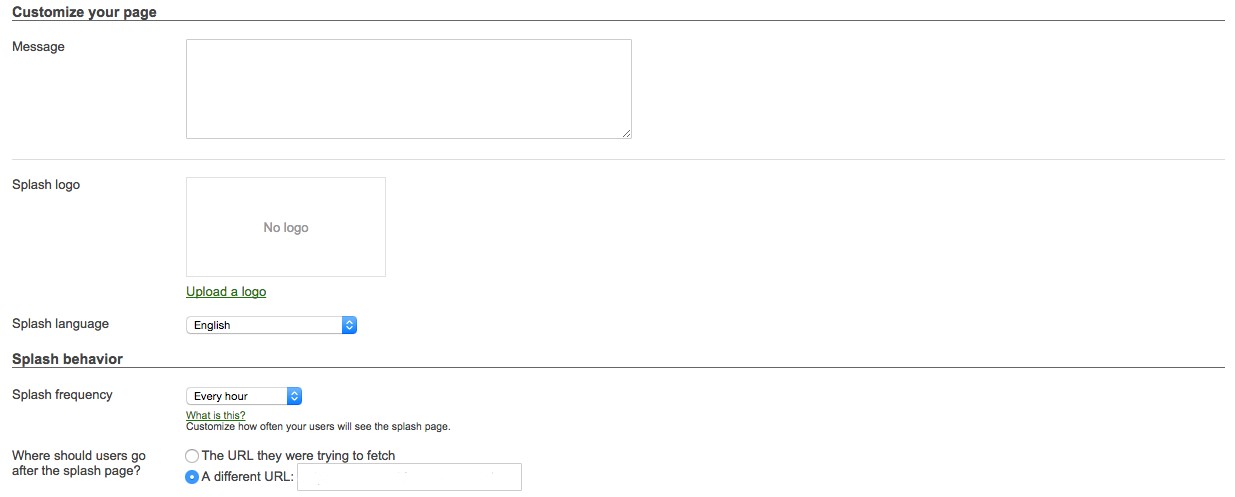
Then save your changes.
SSID Availability
By default, the SSID is enabled on all APs.
If you want to limit on which APs the SSID is available, you can configure a Per-AP availability on "Wireless > SSID availability" by selecting which AP tags should be matched:
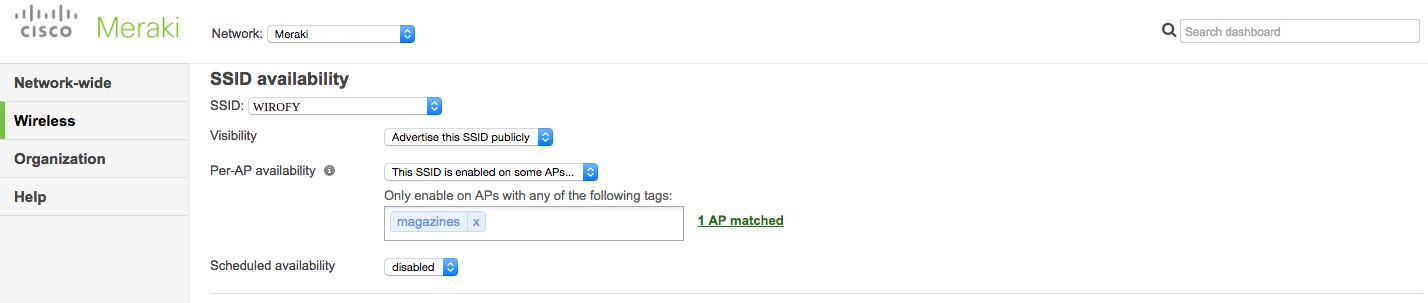
Then save your changes.