Engenius Ezmaster
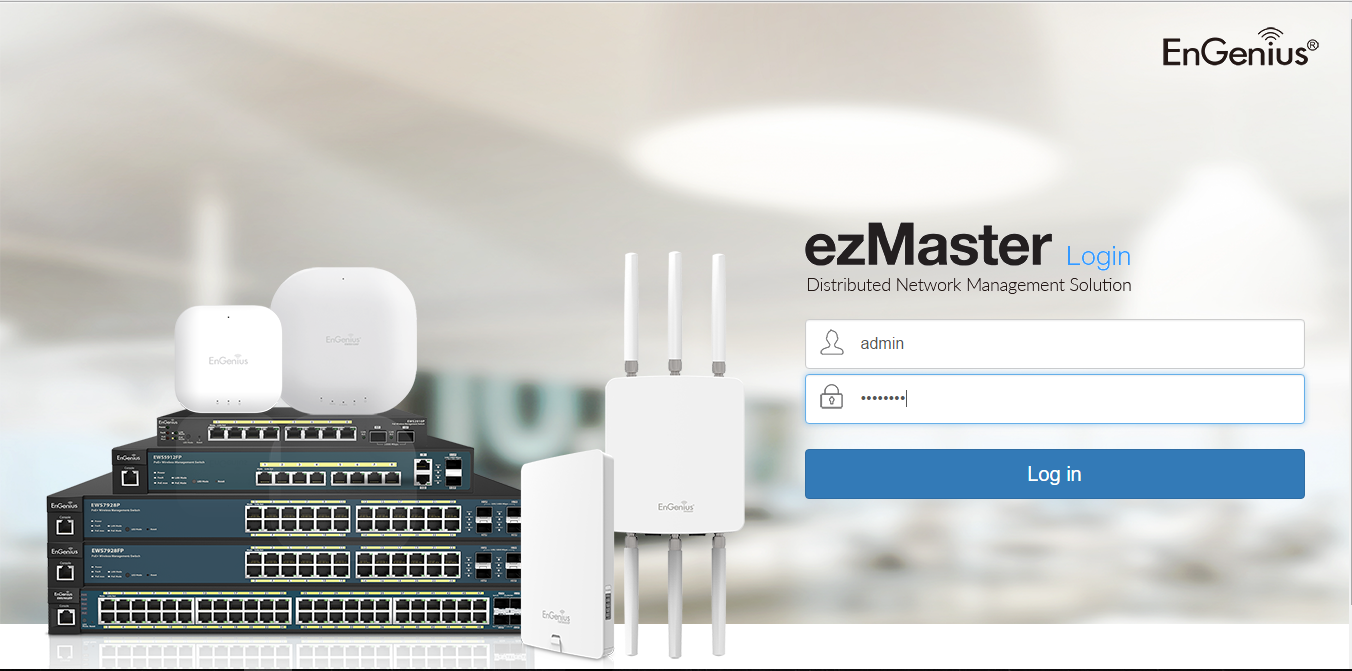
EnGenius devices can be managed via ezMaster or Controller. In the Ezmaster or Engenius Controller management panel, "admin" must be entered in the default user name and "password" in the password. The screenshots in this document were taken through the Ezmaster system. There are similar interfaces on the Controller.
Note: In order to access the ezMaster interface, the ezMaster system must be installed on the network. The ezmaster_usermanual document can be used for installation. {.is-info}
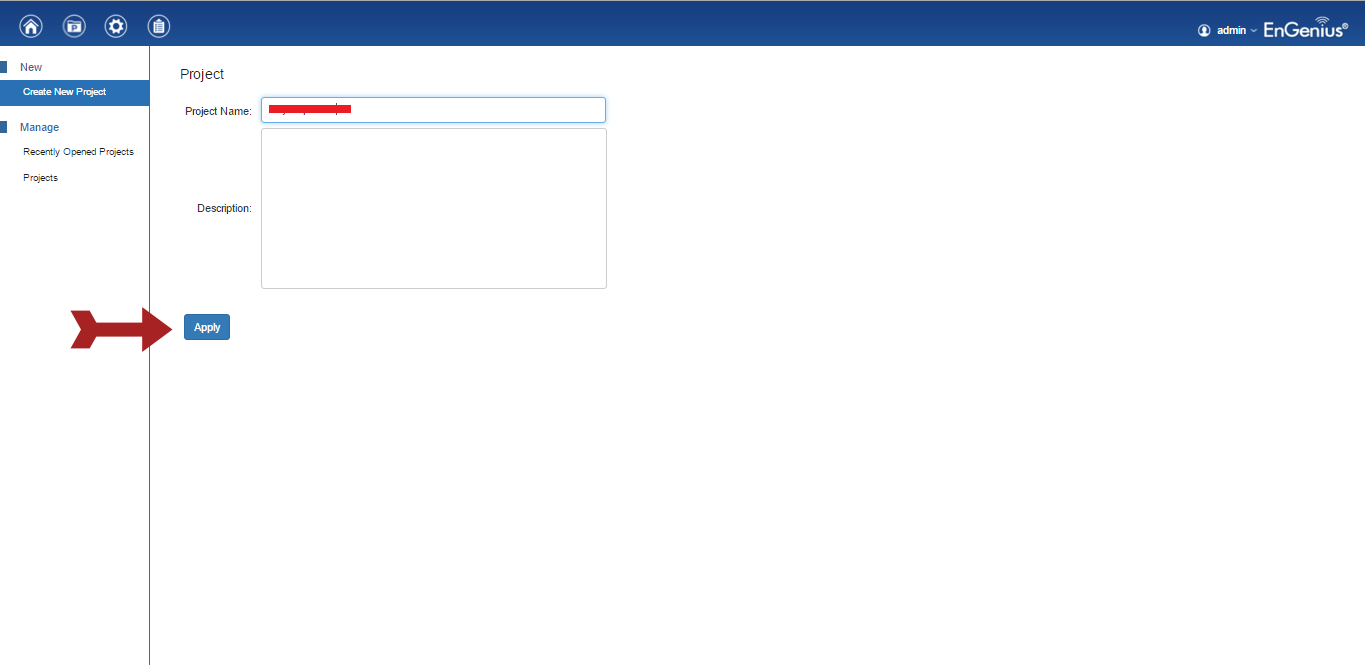
Create New Project must be selected by entering the management interface.

The project should be named and then click on Apply.
Select the device you want to configure from the list and click Add.
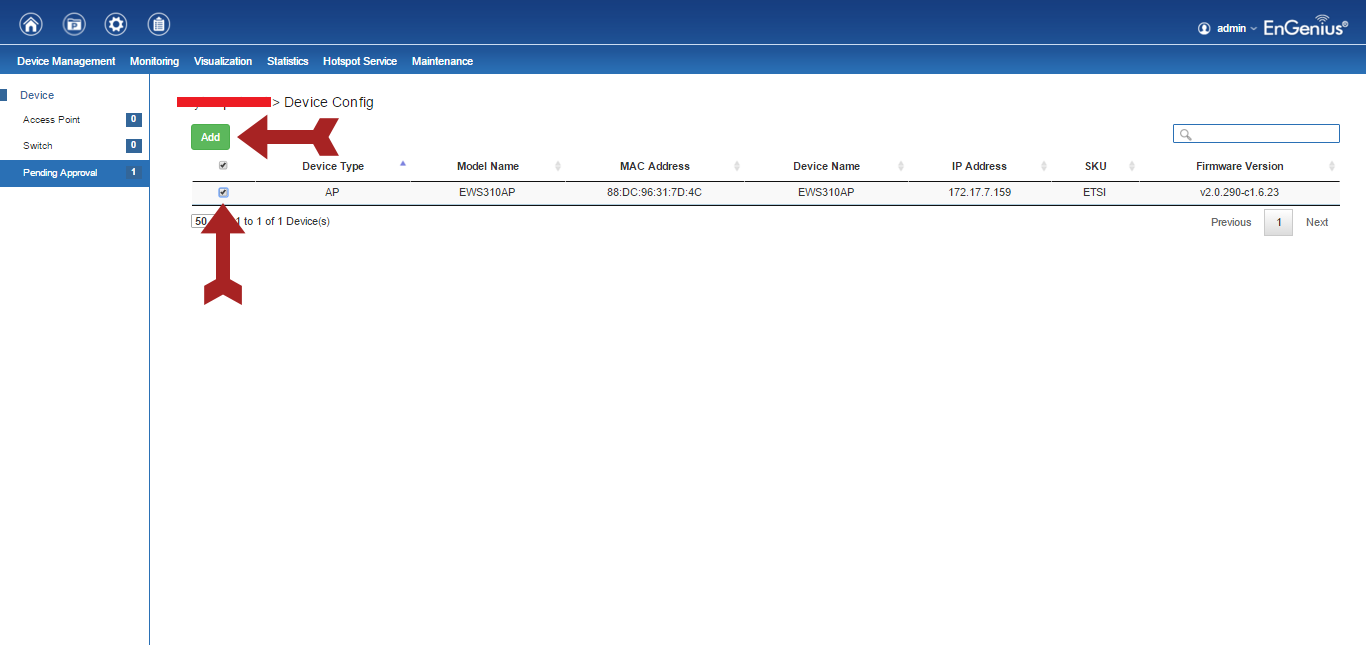
Note 1: Devices to be configured must be ready on the network. Otherwise, the list will be empty. It may take a few minutes for newly connected devices to appear on the list. The list shows all EnGenius products ready for configuration in the network. {.is-info}
Note 2: The system accepts only one configuration per device. If the device you want to reconfigure has a ready configuration, it will not appear in the list. In this case, the current configuration must be edited or the existing configuration must be deleted and the device must be reconfigured. {.is-info}
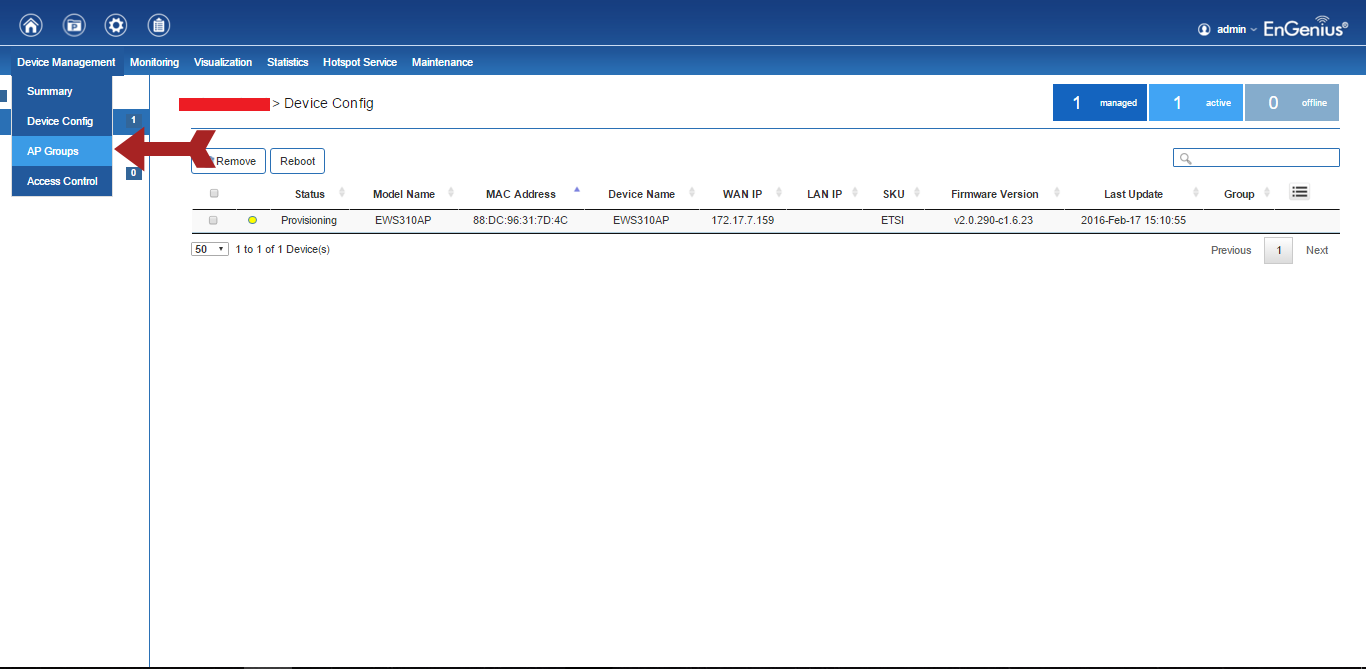
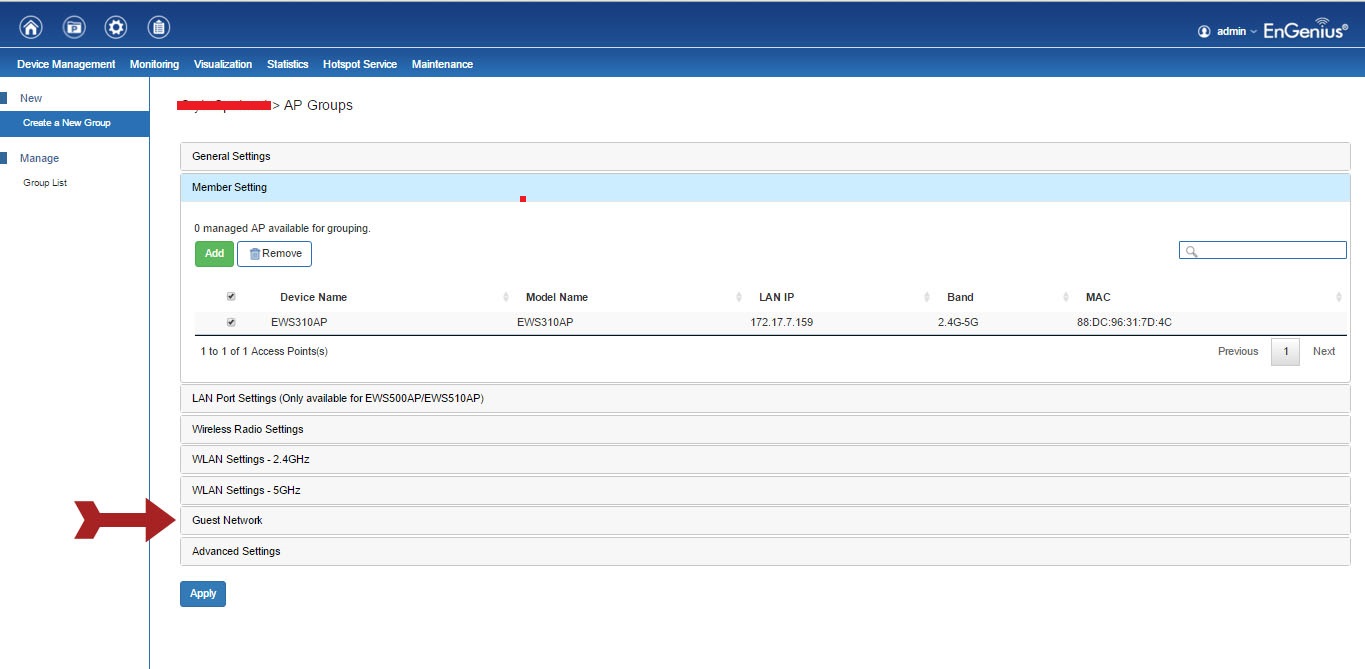
AP Groups should be clicked.
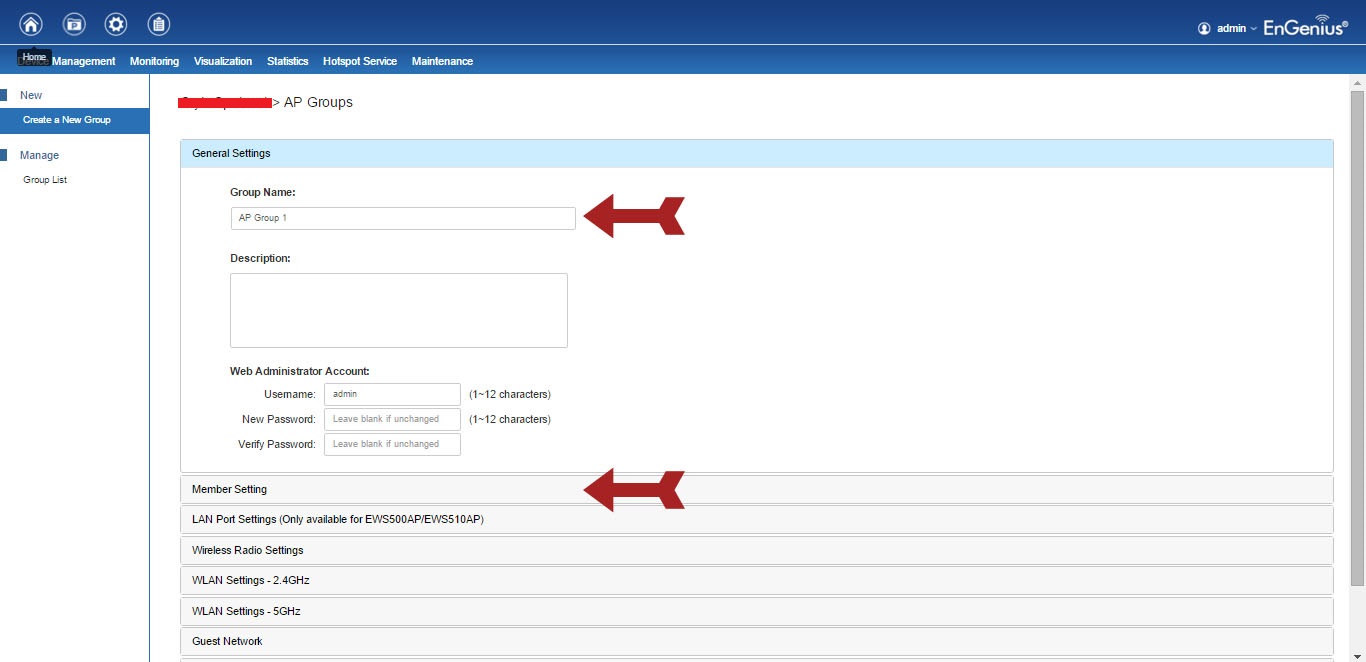
Create a New Group should be clicked.

Name the group and click Member Setting.
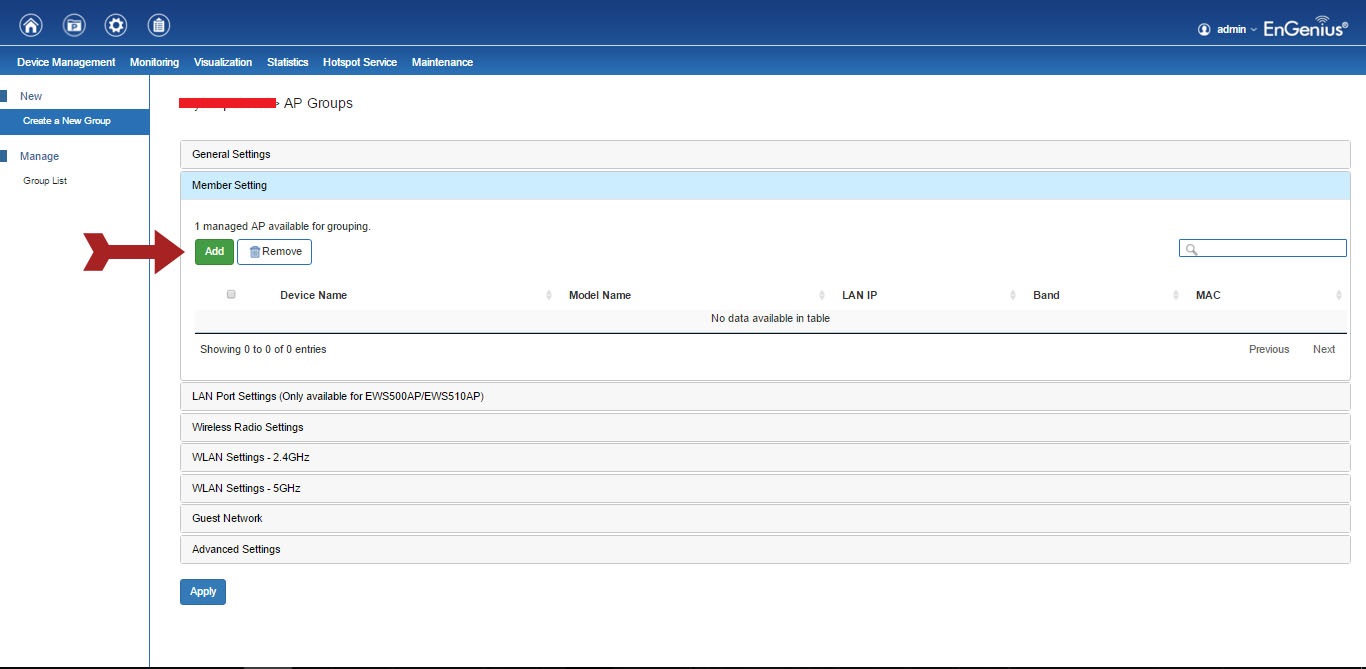
Add should be clicked.
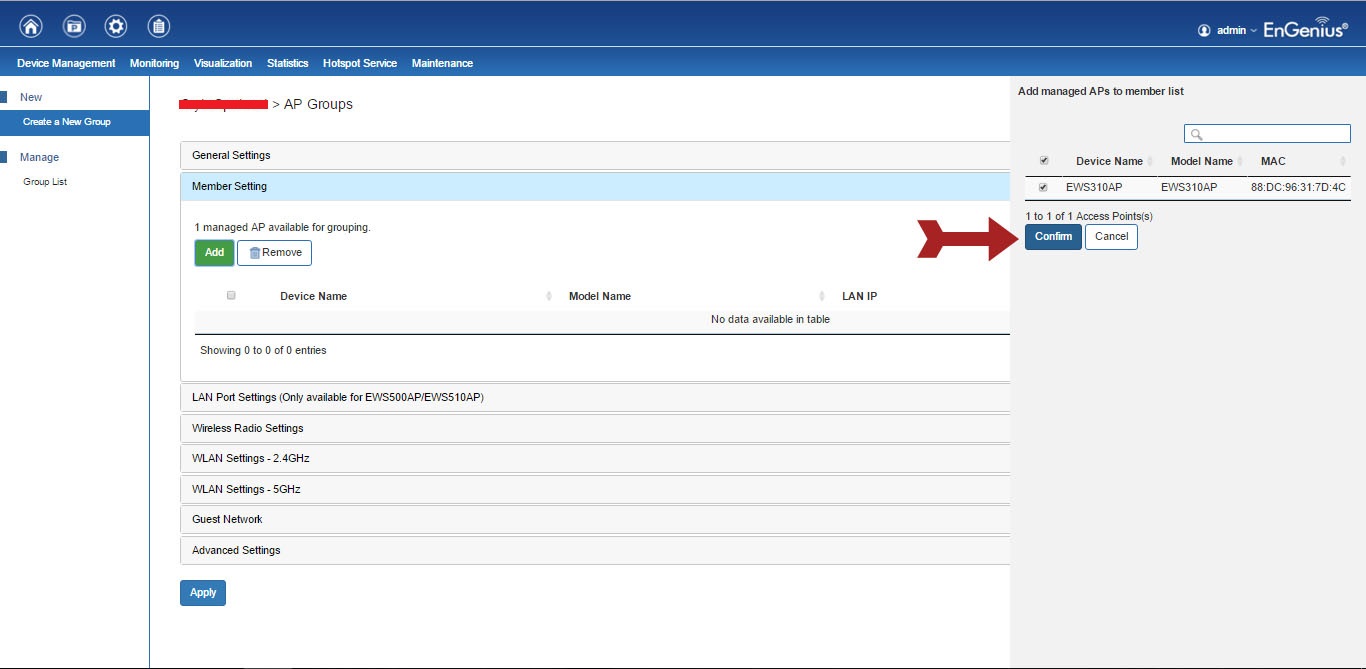
Device should be selected and click on Confirm option.
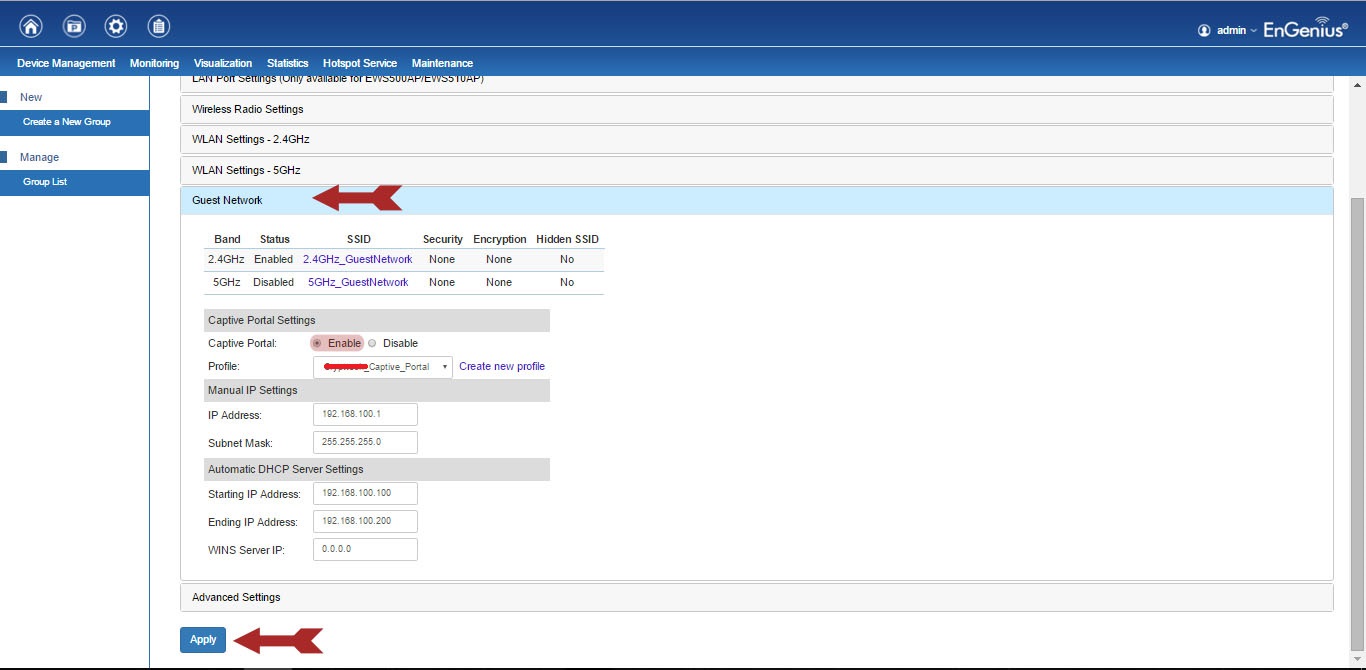
Guest Network should be clicked.
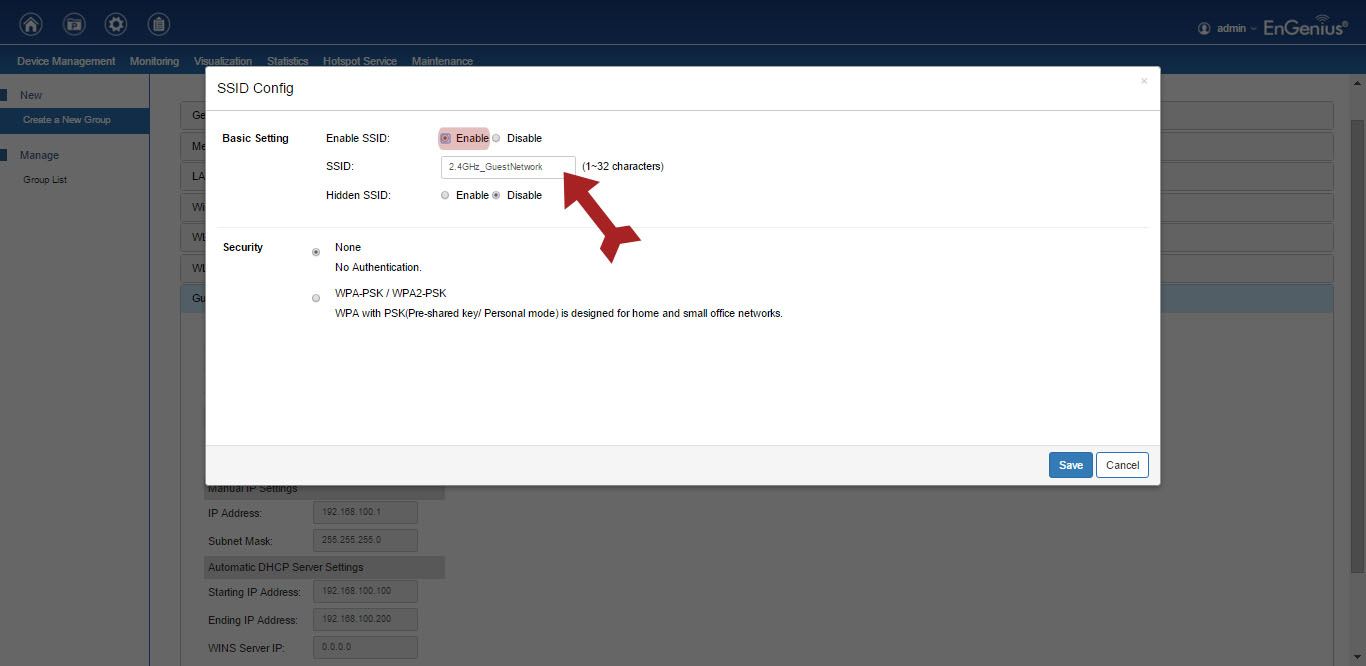
The frequency ranges to be broadcast should be selected from the SSID section.
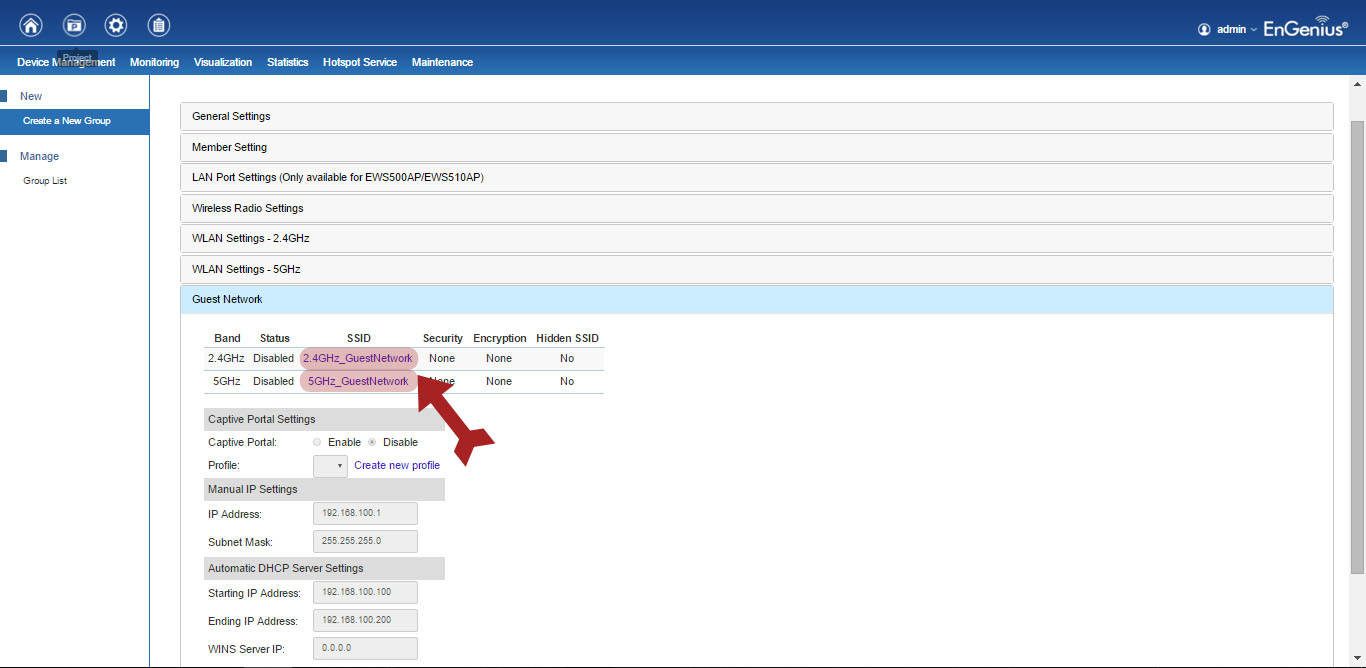
Wireless broadcasting should be activated by selecting enable in Enable SSID option. In the SSID option, the wireless network name must be specified and then saved with the "Save" button.
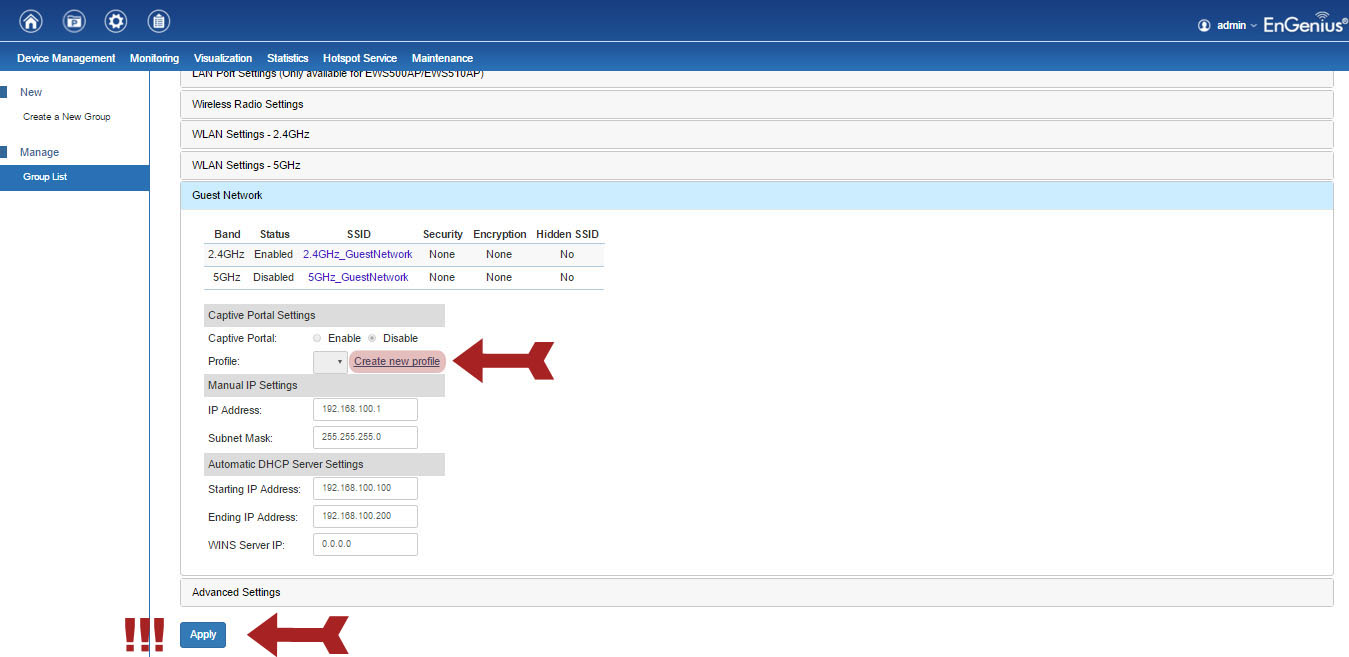
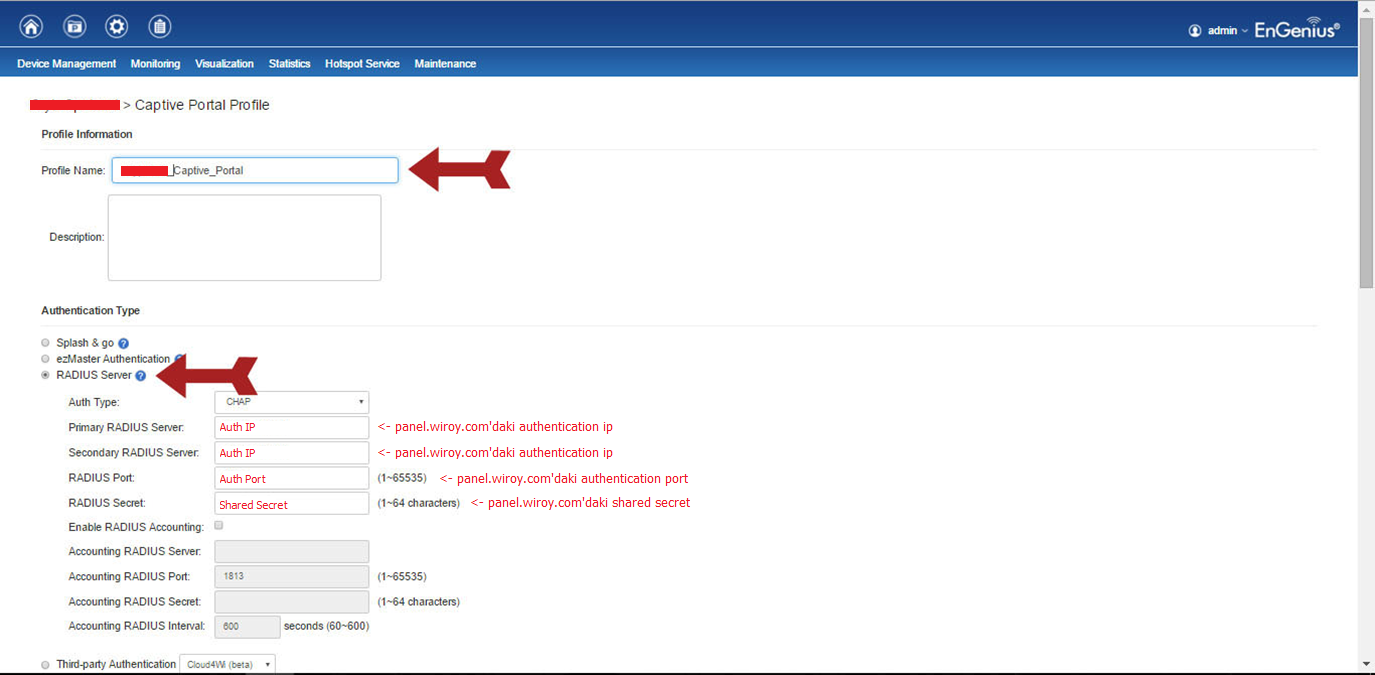
The current setting should be saved by clicking the Apply button. Then, Create new profile should be selected from Profile under Captive Portal Settings.
Add button should be clicked.

Name the profile and select RADIUS Server. Authentication IP, Authentication Port, Shared Secret values in panel.wirofy.com account must be entered in Primary and Secondary RADIUS Server, RADIUS Port and RADIUS Secret.
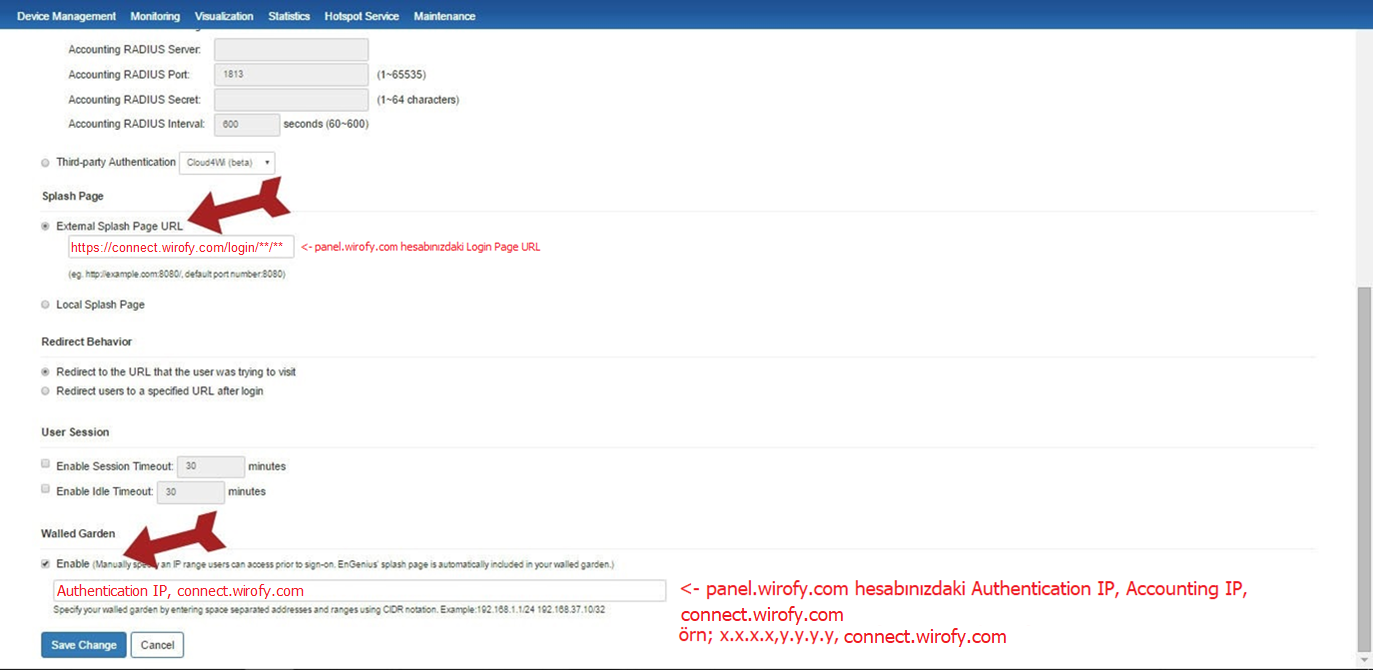
External Splash Page URL must be activated and defined Login Page Url (https://connect.wirofy.com/login/\*\*\*\*) defined for the device in panel.wirofy.com account. Select Enable from the Walled Garden section and select Authentication IP and Accounting IP in the panel.wirofy.com account (if the same, one IP is sufficient), connect.wirofy.com and save it with Save Change buttın.
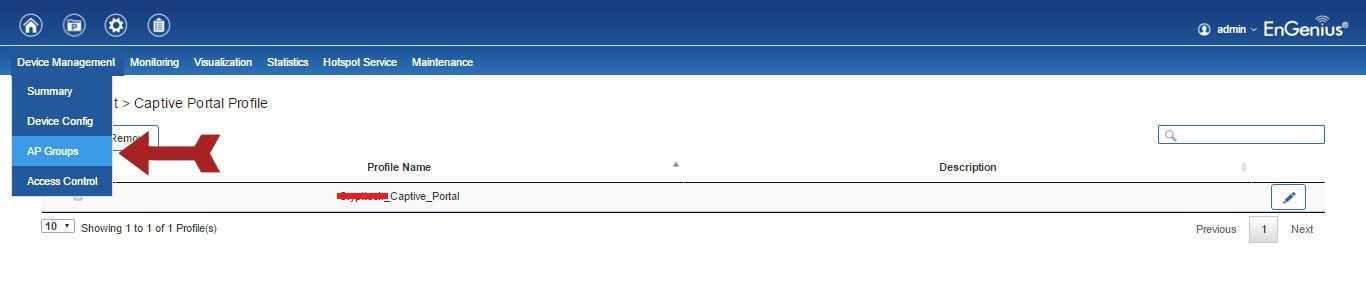
AP Groups should be clicked.
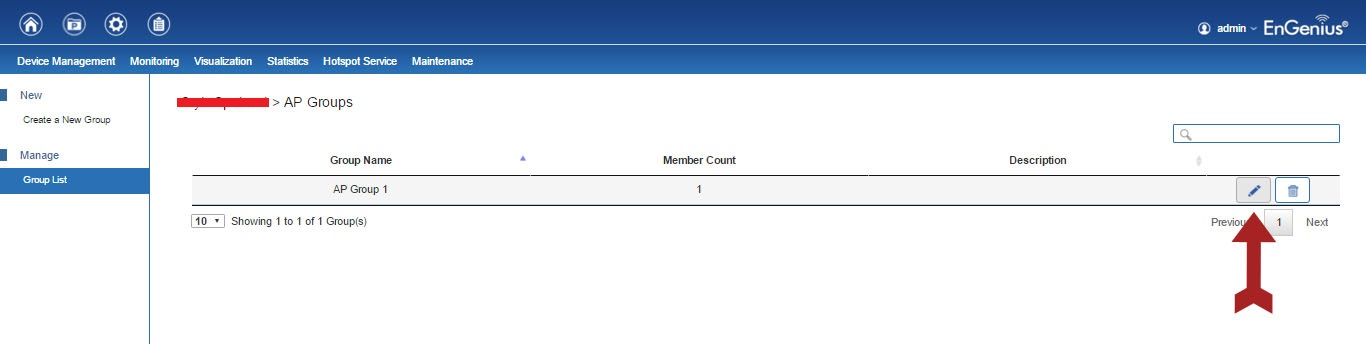
Click the pencil icon to edit the created group.
Click Guest Network, then Enable should be selected in Captive Portal section and the settings should be saved with Apply button.