Mikrotik RouterOS
This section contains an example configuration for Mikrotik. Mikrotik RouterOS can work on any running RouterBoard. It also contains configuration settings for models with wireless capability. In models without wireless feature, interface settings can be made for physical ports.
Winbox Setup and Initial Connection
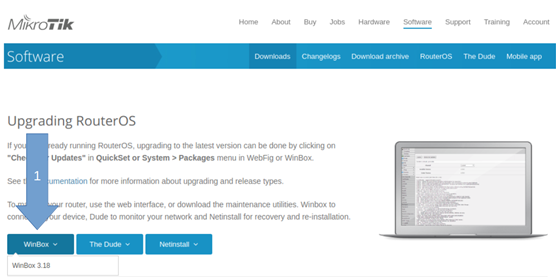
Winbox program should be downloaded from https://mikrotik.com/download.
The downloaded Winbox.exe file should be run and the following settings should be made to connect.
To connect directly to the device, type ;
- Connect To: 192.168.88.1
- Login: admin
and click Connect button.
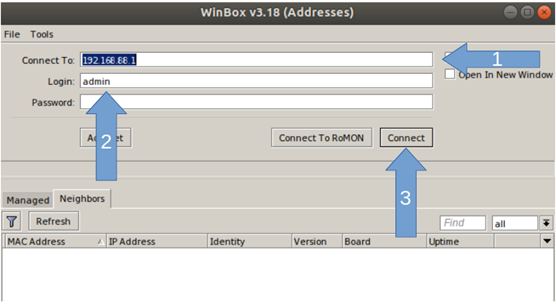
Note: Depending on the device, connect and login information may change. At the same time, Mikrotik devices that can be actively connected within the network can be seen from the “Neighbors” section. {.is-info}
If Mikrotik Device is to be set from scratch, after successfully connecting to the device, the Remove Configration button should be clicked on the window that opens. All configurations on the device will be reset.
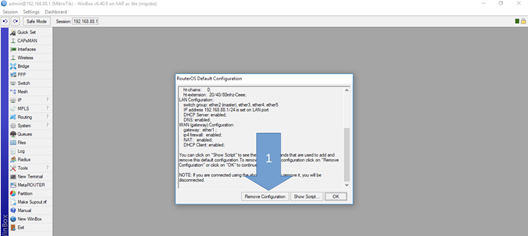
Note: After pressing the "Remove Configuration" button, the device will be disconnected and the device will restart itself. {.is-info}
DHCP Configuration
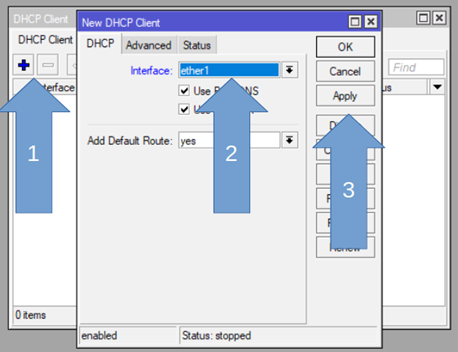
Click the IP -> DHCP Client menu from the left menu. After clicking the + button in the window that opens, the window should be closed by selecting
- Interface: ether1
in the window that opens and clicking the Apply and OK buttons respectively.
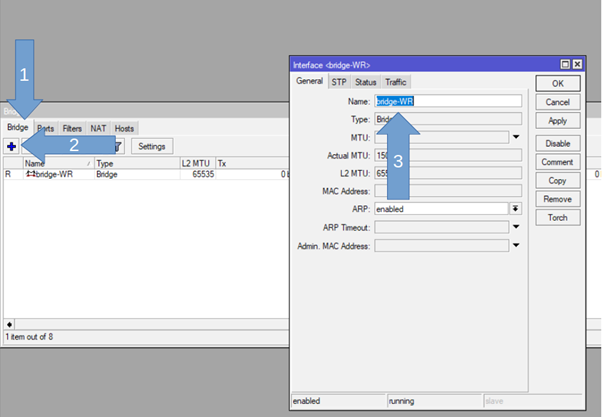
Bridge Creation and Bridge-Port Mapping
Click the Bridge menu from the left menu. Click on the Bridge tab in the opened window, after clicking the + button, the window should be closed by clicking Apply and OK buttons after changing to
- Name: bridge-WR
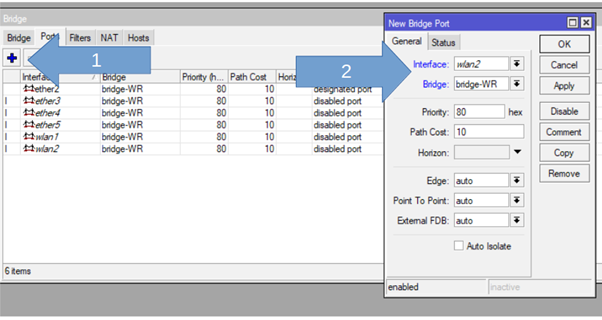
Then click on the "Ports" tab and click on the + button in the window that opens
- Interface: All values except ether1 (if any, dynamic, none) must be created in order
- Bridge: bridge-WR
should be selected and applied for all interface values. Winbox connection may be lost during this application. Port can be reconnected and continue to be defined.
Wi-Fi Settings (Skip If Not Wireless Model)
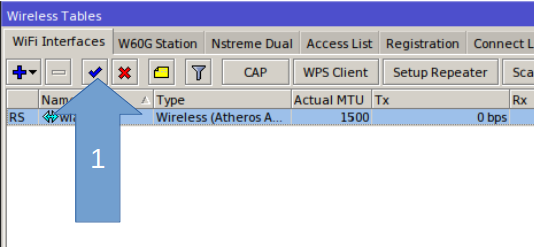
Click on the "Wireless" menu from the left menu, then switch to the "WiFi Interfaces" tab in the window that opens.
Interfaces that are inactive in the list are selected and activated.
The interfaces in the list should be double clicked and the "Wireless" tab should be opened in the window that opens, and the fields specified below should be edited.
- Mode: ap bridge
- SSID: Enter the WI-FI access point name (WI-FI Network Name).
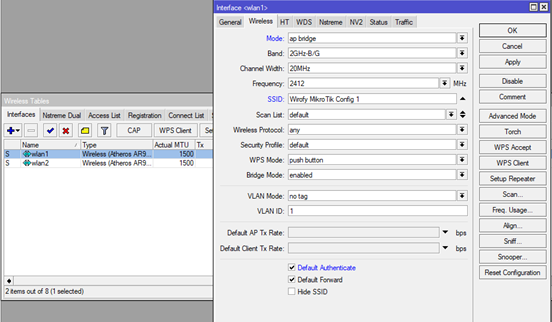
Then, the following fields should be marked by going to the “HT” tab.
- Tx Chains
- Rx Chains
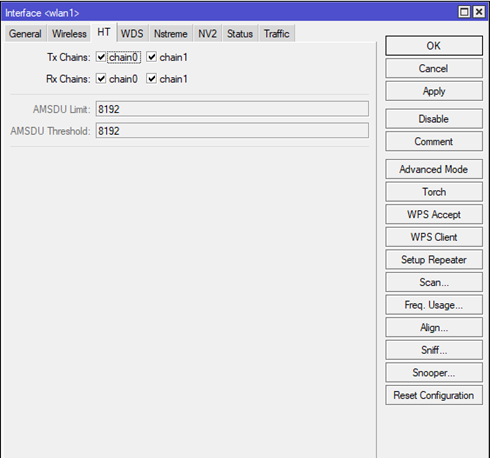
By clicking the Apply and OK buttons, the last window opened is closed.
Note: The same arrangements should be made for other Interfaces in the list. {.is-info}
After switching to the "Security Profiles" tab, double click on the default profile in the list. In the opened window
- Name: default
- Mode: none (should be changed to. After this change, there will be no password in WI-FI access.)
Mode: dynamic keys If selected, the SSID password will be applied. WPA2 can add passwords with PSK. {.is-info}
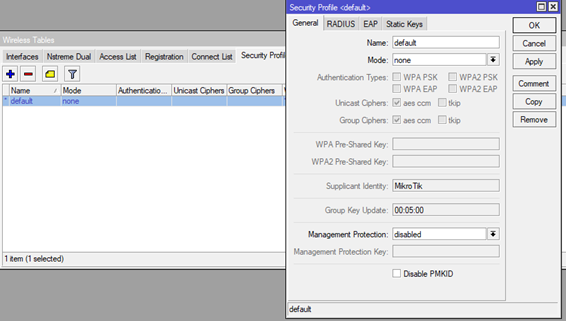
The last window opened by clicking the Apply and OK buttons should be closed.
Hotspot Installation
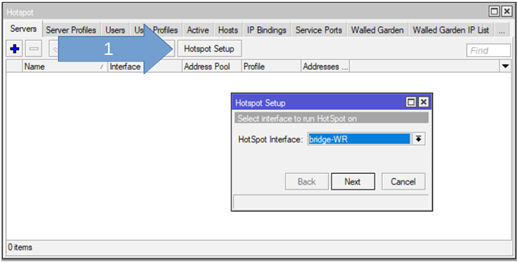
Click "IP -> Hotspot" menu from the left menu. Click on the "Servers" tab in the window that opens. Then the "Hotspot Setup" button should be clicked.
- Hotspot Interface: bridge-WR
Next button should be clicked.
Address ranges can be customized. It is not mandatory to proceed on the given examples. {.is-info}
- Local Address of Network: 10.5.50.1/24

- Address Pool of Network: 10.5.50.2-10.5.50.254

- Select Certificate: none

- SMTP Server: 0.0.0.0

- DNS Servers: 8.8.8.8 or any dns server address

- DNS Name: None or hotspot.wirofy.com

- Name of Local HotSpot User: user
- Password for the User: none or user
After the changes, the hotspot configuration is completed by clicking the Next button.
The following settings must be made to change the shared user property (a user's concurrent connection limit). Switching to the "User Profiles" tab, double-clicking the profile named "default" in the list. In the opened window;
- Shared Users: Must be left empty or a number entered. (will be unlimited if left empty) Then, Apply* and OK** buttons should be clicked respectively.
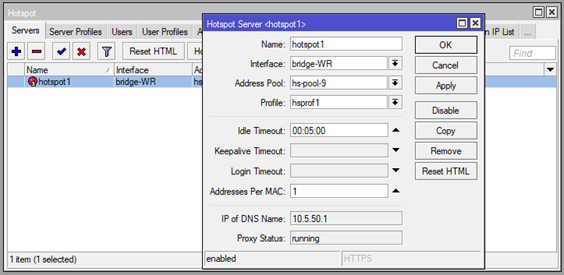
Switch to the Servers tab. Double click on the configuration named "hotspot1" in the list. In the window that opens;
- Profile: If there is no hsprof1, default should be selected.
- Adresses per MAC: 1
After the changes, Apply and OK buttons should be clicked.
Switch to the "Server Profiles" tab. The profile named “hsprof1” in the list selected in the previous step should be double clicked. The "Login" tab should be changed in the window that opens.
- HTTP PAP: It must be activated.
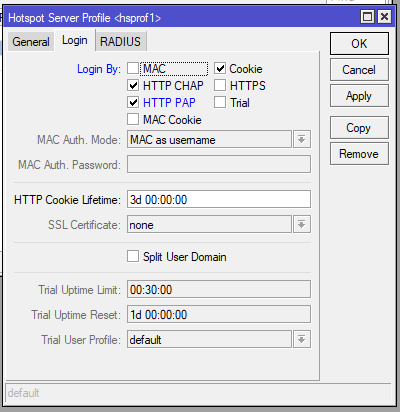
Then the “RADIUS” tab should be selected.
- Use RADIUS: It must be activated.
- Default Domain: will not be selected.
- Location ID: will not be selected.
- Location Name: will not be selected.
- Mac Format: XX:XX:XX:XX:XX:XX
- Accounting: It must be activated.
- Interim-Update: 00:05:00
- Nas Port Type: 19 (wireless-802.11)

Then, the windows should be closed by clicking Apply and OK buttons respectively.
Walled Garden Settings
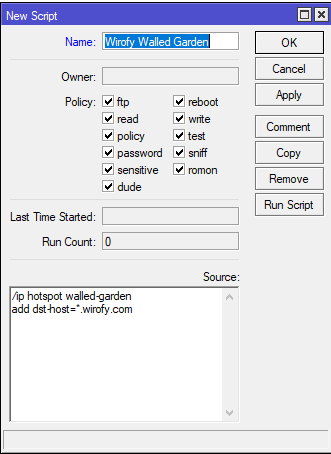
Click the "System -> Scripts" menu in the left menu, then press the + sign. In the window that opens;
- Name: Wirofy Walled Garden
- Source:
/ip hotspot walled-garden
add dst-host=*.wirofy.com
After editing, "Apply" button is clicked. Then the window is closed by clicking the "Run Script" button and clicking the "OK" button.
Login Page Customization
Click the "System -> Scripts" in the left menu, then press the "+" sign. In the window that opens;
- Name: Wirofy Login Page
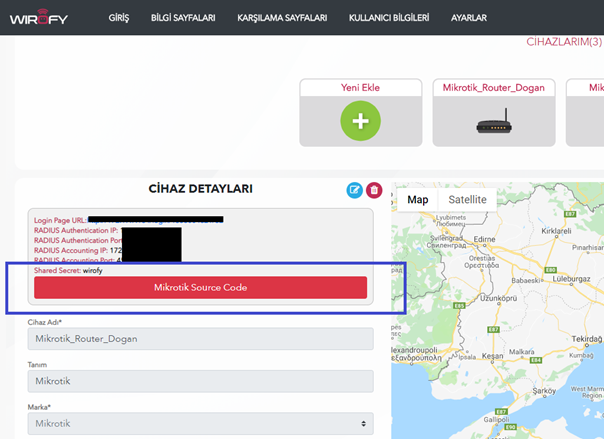
- Source: When the device created or to be created according to the document is displayed, the "Mikrotik Source Code" button should be pressed and the codes on the page opened should be copied and pasted here.
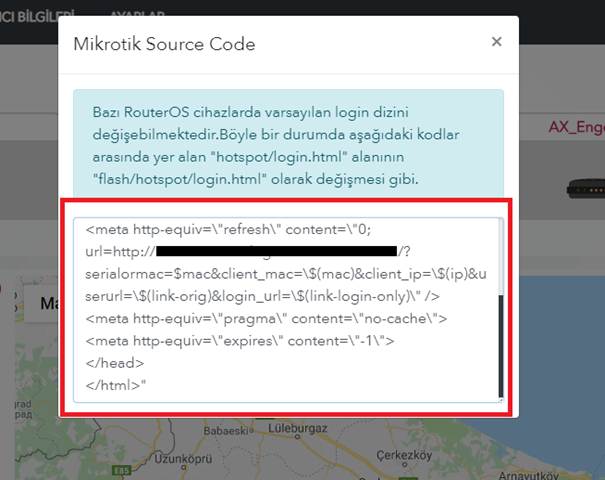
After editing, Apply button should be clicked, then Run Script button should be clicked. The window should be closed with the OK button.
Radius Settings
Before entering the settings here, the information specified for the device should be noted on "panel.wirofy.com". Click here
Click on the "Radius" menu in the left menu. Click the "+" button in the window that opens. Then the "General" tab should be selected. The fields should be arranged as follows:
- hotspot: It should be marked.
- Called ID: will not be selected.
- Domain: will not be selected.
- Address: RADIUS Authentication IP panel.wirofy.com
- Secret: Shared Secret on panel.wirofy.com
- Authentication port: RADIUS Authentication Port on panel.wirofy.com
- Accounting port: RADIUS Accounting Port on panel.wirofy.com
- Timeout: 300 ms
- Acccountig Backup: The mark must be removed.
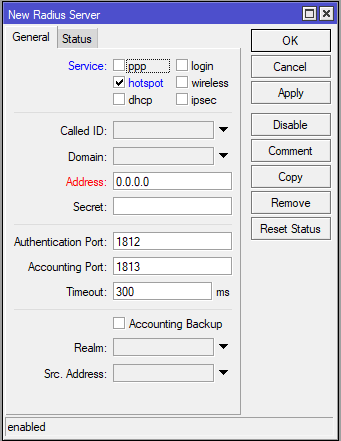
Address, Secret, Authentication port, Accounting port sections can be obtained from the device details created on https://panel.wirofy.com. {.is-info}
Then open windows should be closed by clicking "Apply" and "OK" buttons respectively.
Adding Firewall Rules
Click on the "IP -> Firewall" in the left menu. Click the "+" button in the window that opens, and then the "General" tab should be opened.
- chain: input
- In. Interface: bridge-WR
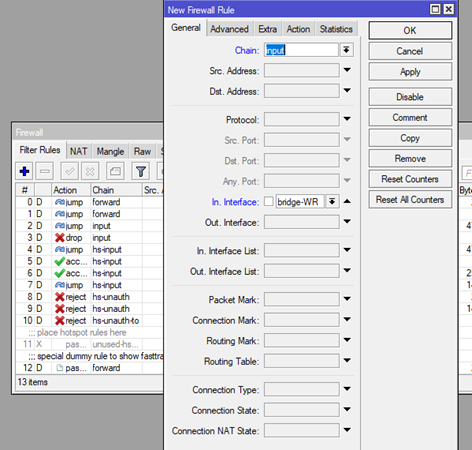
After the changes, the "Action" tab should open.
- Action: drop

After changes, "Apply" and "OK" buttons should be pressed respectively.
Date and Time Settings
Click the "System -> Sntp Client" in the left menu.
- Enabled: It should be marked.
- Mode: It should be left as broadcast. It will be unicast after "Apply"
- Primary NTP Server: 0.europe.pool.ntp.org
- Secondary NTP Server: 1.europe.pool.ntp.org
NTP Server suitable for your region can be selected from https://www.pool.ntp.org. The example above applies to the European region. {.is-info}
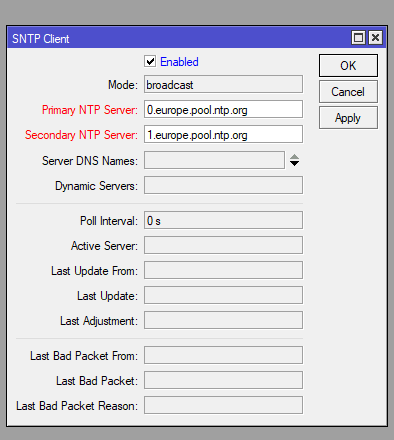
Then "Apply" and "OK" buttons should be clicked.
"System -> Clock" in the left menu should be clicked.
- Time Zone Autodetect: It should be marked.
- Time Zone Name: It should be changed according to your region.

Then "Apply" and "OK" buttons should be clicked.
Finding the Device Serial Number
Click on the "System -> Routerboard" menu in the left menu. In the encountered window, the number in the "Serial Number" field is copied. The device created for this product in "https://panel.wirofy.com" is edited and saved in the SN / MAC field.