Edge Core
This section contains the configuration example for Edge-Core Controller. This model of Edge-Core is used to manage the same brand of Access Points. Integration is also possible for stand-alone Access Point models. However, this document describes the necessary definitions on the Edge-Core Controller after Wirofy accesses the management panel for integration. For detailed definitions, Edgecore_EWS_User_Manual_20180511.pdf can be referenced.
The integrated model and version information is as follows.

Radius Settings
After entering the Edge-Core Controller management page, the definition of "External Radius" is made on the Users> External Authentication> Radius page.
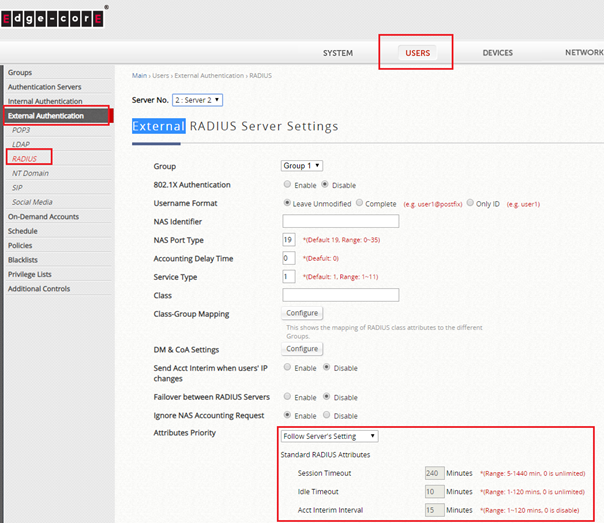
The value can be left by default. Session Timeout and Idle Timeout can be customized in Attributes Priority section.
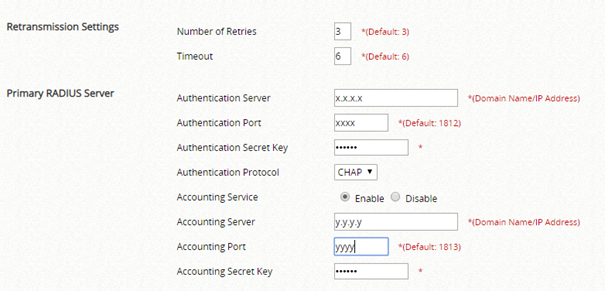
Click here to review the document on how to obtain the information to be entered in this section.
- Authentication Server
- Authentication Port
- Authentication Secret Key
- Accounting Server
- Accounting Port
- Accounting Secret Key
The above fields can be obtained from the "Devices" page in your https://panel.wirofy.com account.
SSID Settings
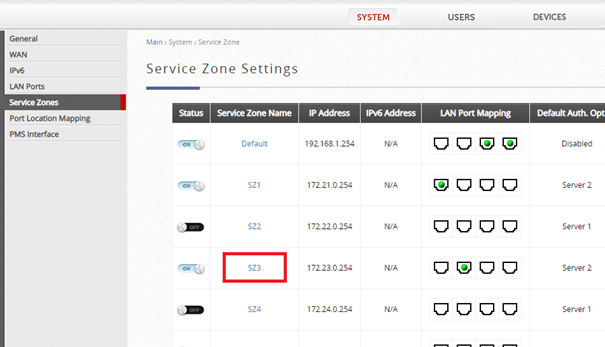
First, a new Wireless Network must be created on the System> Service Zones> Related SZ page. Service Zone can be assigned to a specific port.
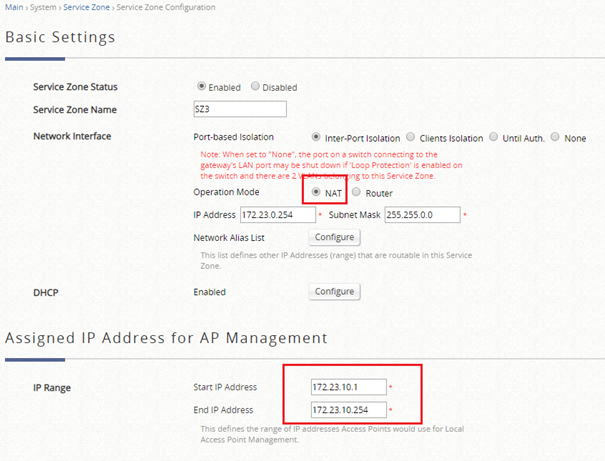
Basic Setting
- Operation Mode: NAT should be selected. The relevant IP range must be given.
Assigned IP Adress For AP Managament
- IP Range: The relevant IP range must be given.
Authentication Settings
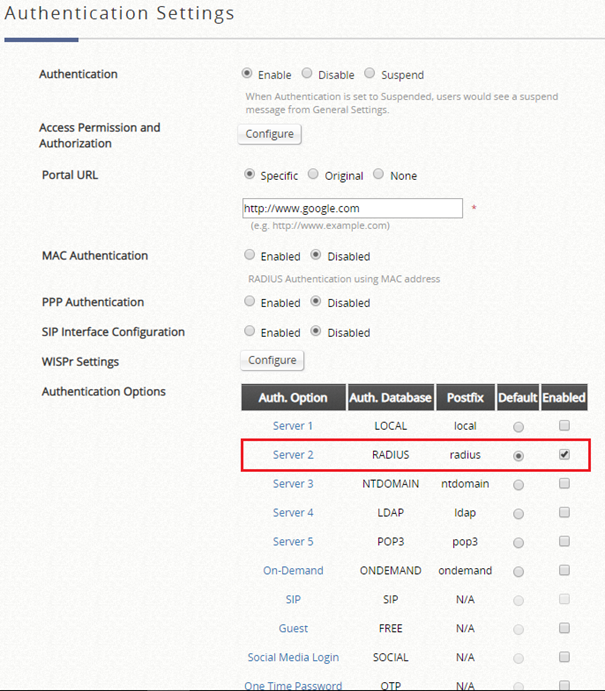
- Portal URL: Address to be redirected after successful login
- Authentication Option: In the line with the value Radius, "Default" and "Enabled" options should be checked and if "Enabled" values in other lines are selected, it should be removed.
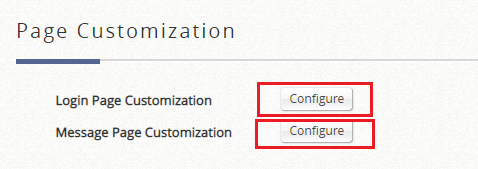
Page Customization
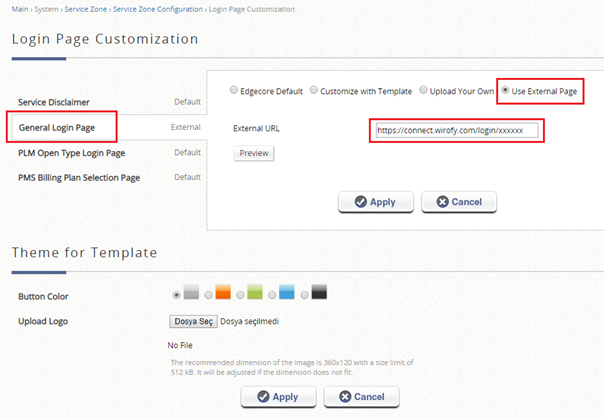
In Login Page Customization setting, Configure button should be clicked. "General Login Page" section should be changed on the page that opens.
- Use External Page should be selected.
- External URL: For this device, login page url information in the device detail created on panel.wirofy.com should be entered.
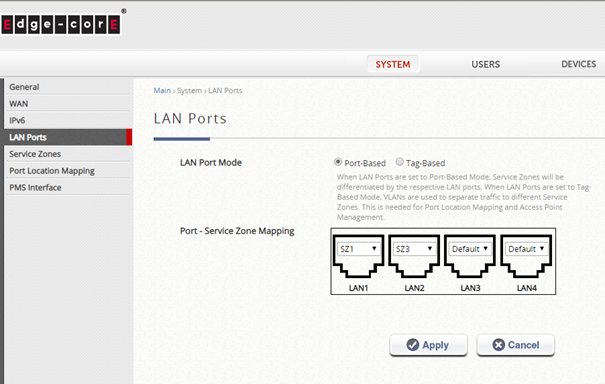
Port Mapping on Service Zone
After all the settings have been entered, the relevant Service Zone must be assigned to the relevant port. Port can be selected from System > Lan Ports. It will be ready after connecting an Access Point to the relevant Port.
Access Point Management
Management can be achieved by clicking the Enter button opposite the Local Area AP Management setting on the Devices page.